This post may contain affiliate links. If you purchase through these links, we may earn a small commission at no extra cost to you. We only recommend products we genuinely love.
Why a Chalkboard Calendar Works as Decor
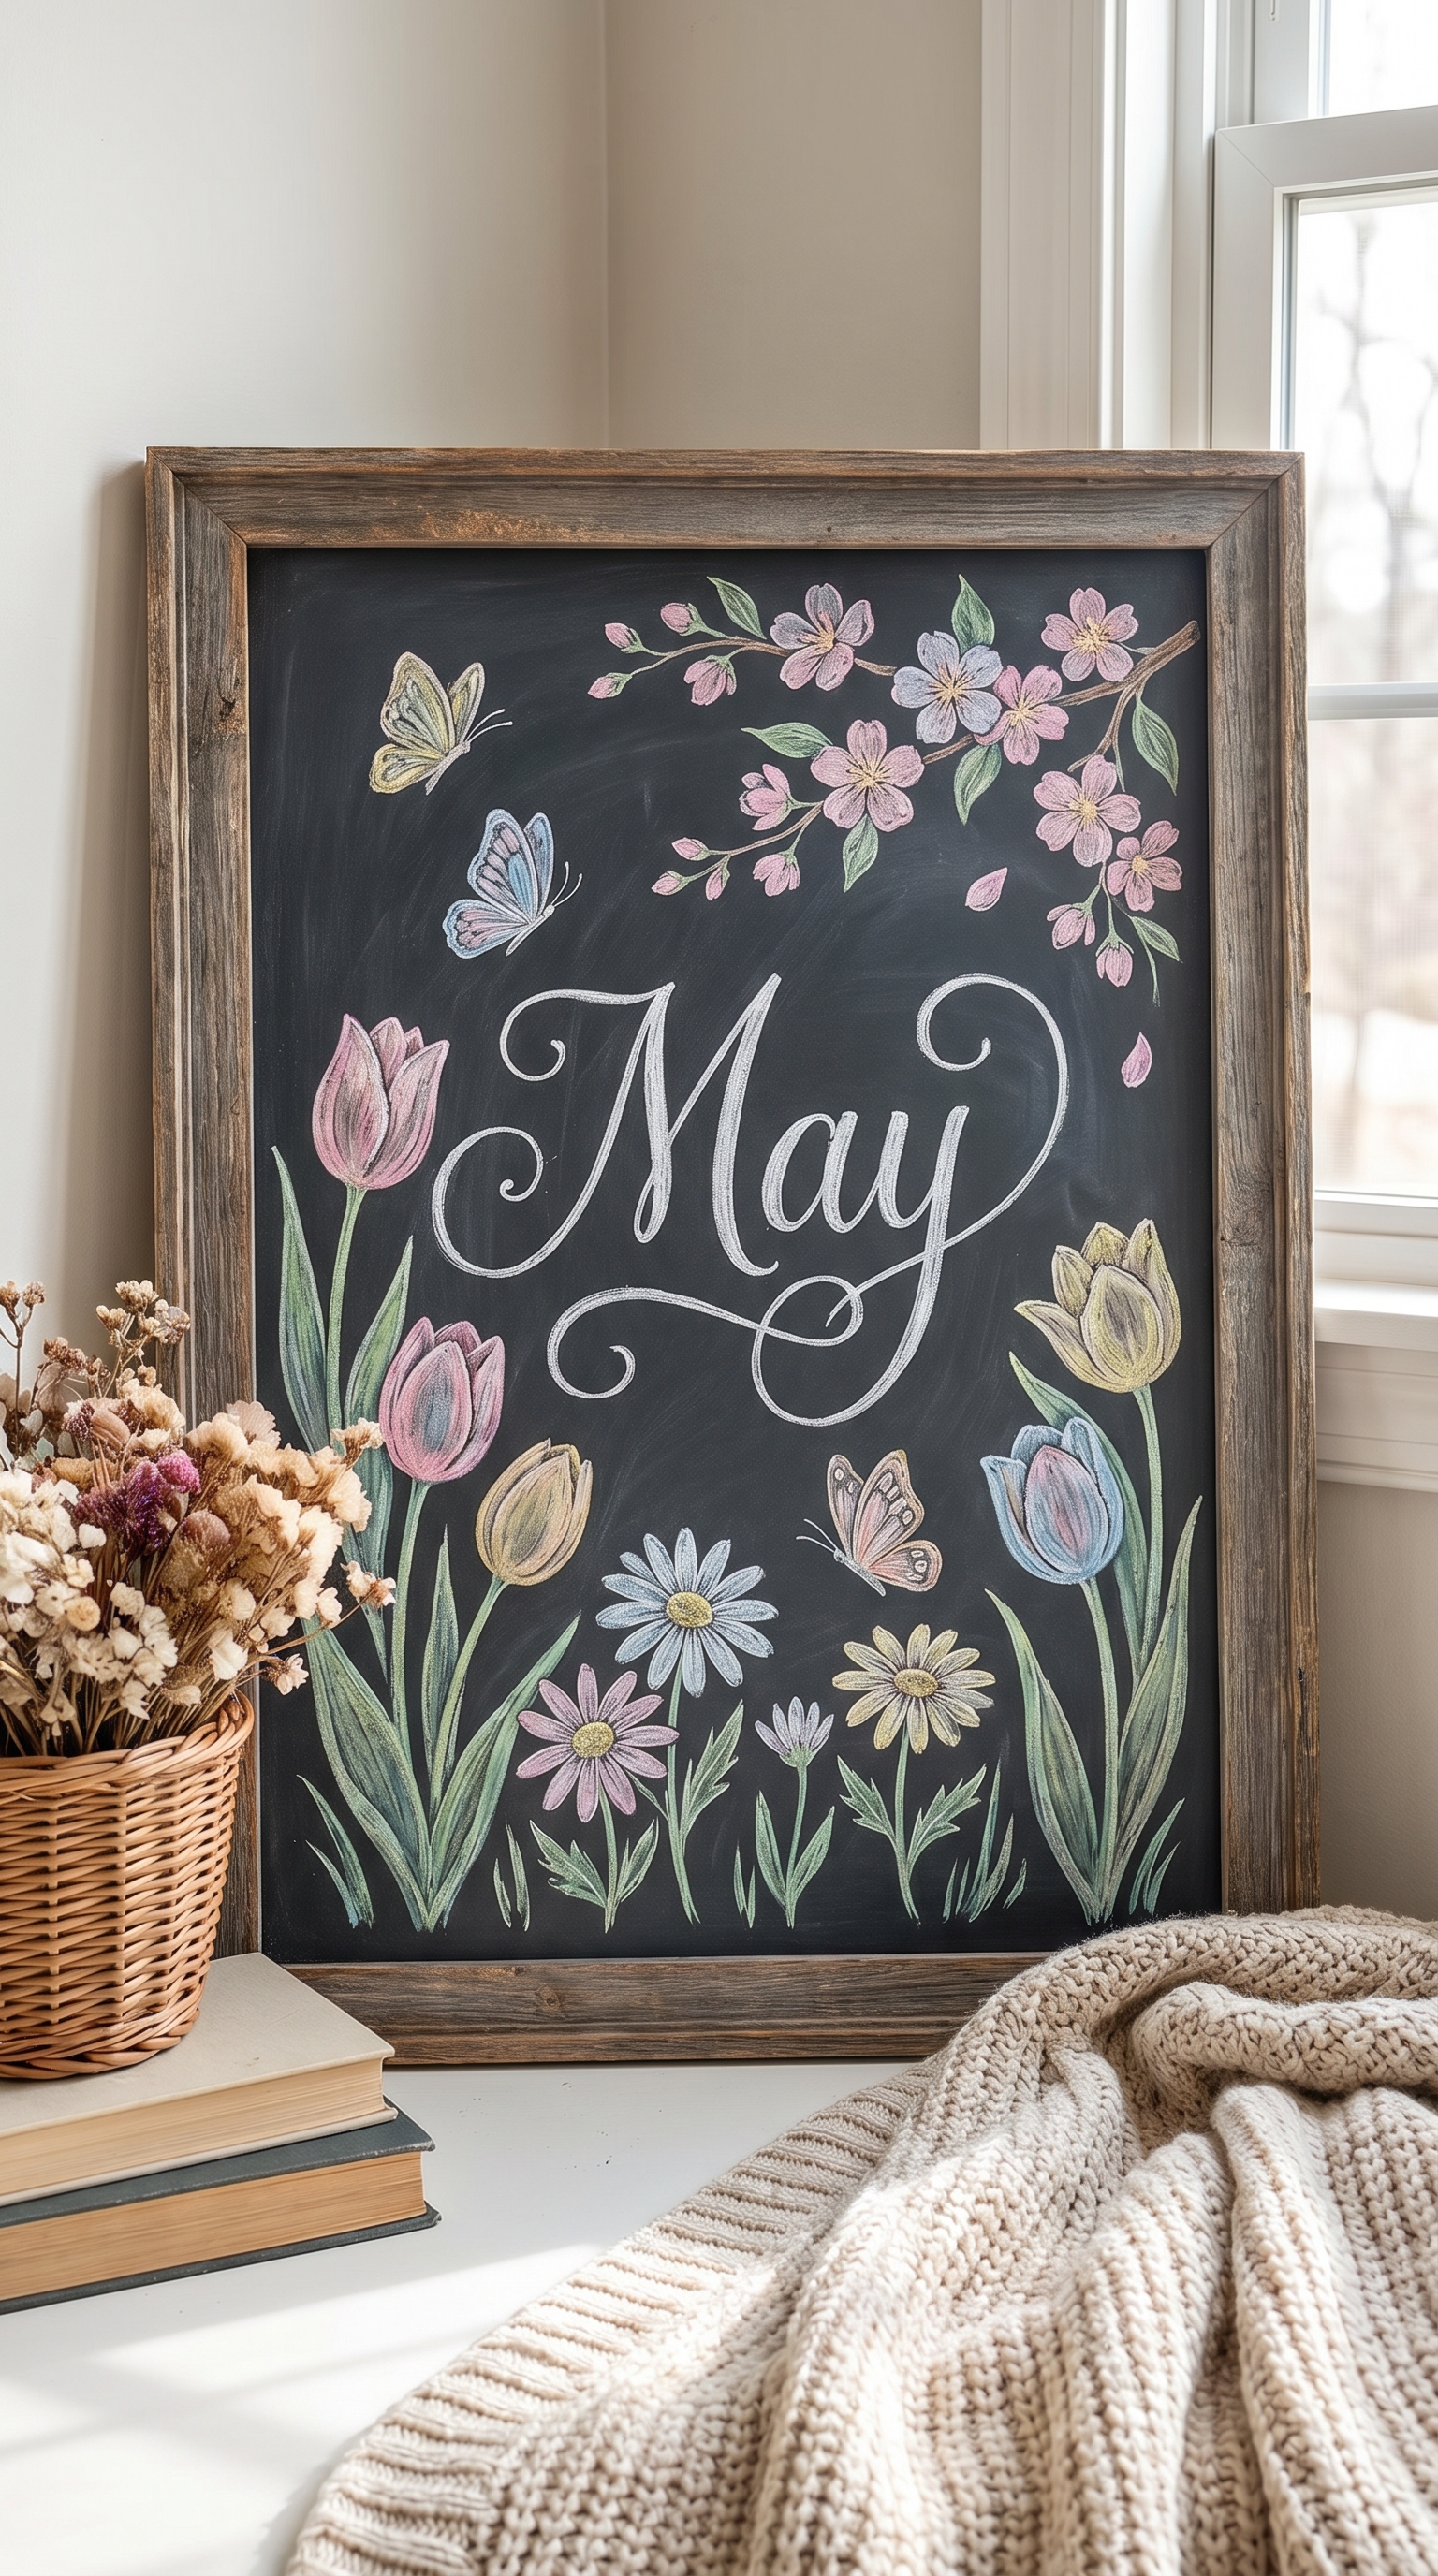
A may chalkboard calendar is one of those rare decor pieces that is both beautiful and genuinely useful. Unlike a printed may calendar that you toss at the end of the month, a chalkboard calendar becomes a rotating canvas that changes with the seasons — giving you a fresh piece of wall art every thirty days. Whether you are searching for may calendar 2026 templates or creative may calendar ideas to display in your kitchen, the hand-drawn quality of chalk lettering adds warmth and personality that a mass-produced print simply cannot match. In May, your may chalkboard calendar can bloom with spring florals; by December, it can sparkle with snowflake doodles. May calendar chalkboard ideas have become a staple in farmhouse kitchens, modern home offices, and cozy entryways because they serve double duty: keeping your family on schedule while filling a blank wall with charm. Whether you are an experienced chalk artist or just learning to hold a chalk marker, a monthly calendar is the perfect project to start with because the grid structure gives you built-in guidance.
Simple Grid Calendar Designs
The grid is the backbone of any chalkboard calendar. These three simple grid styles are perfect for beginners and each one creates a distinctly different look on your wall.
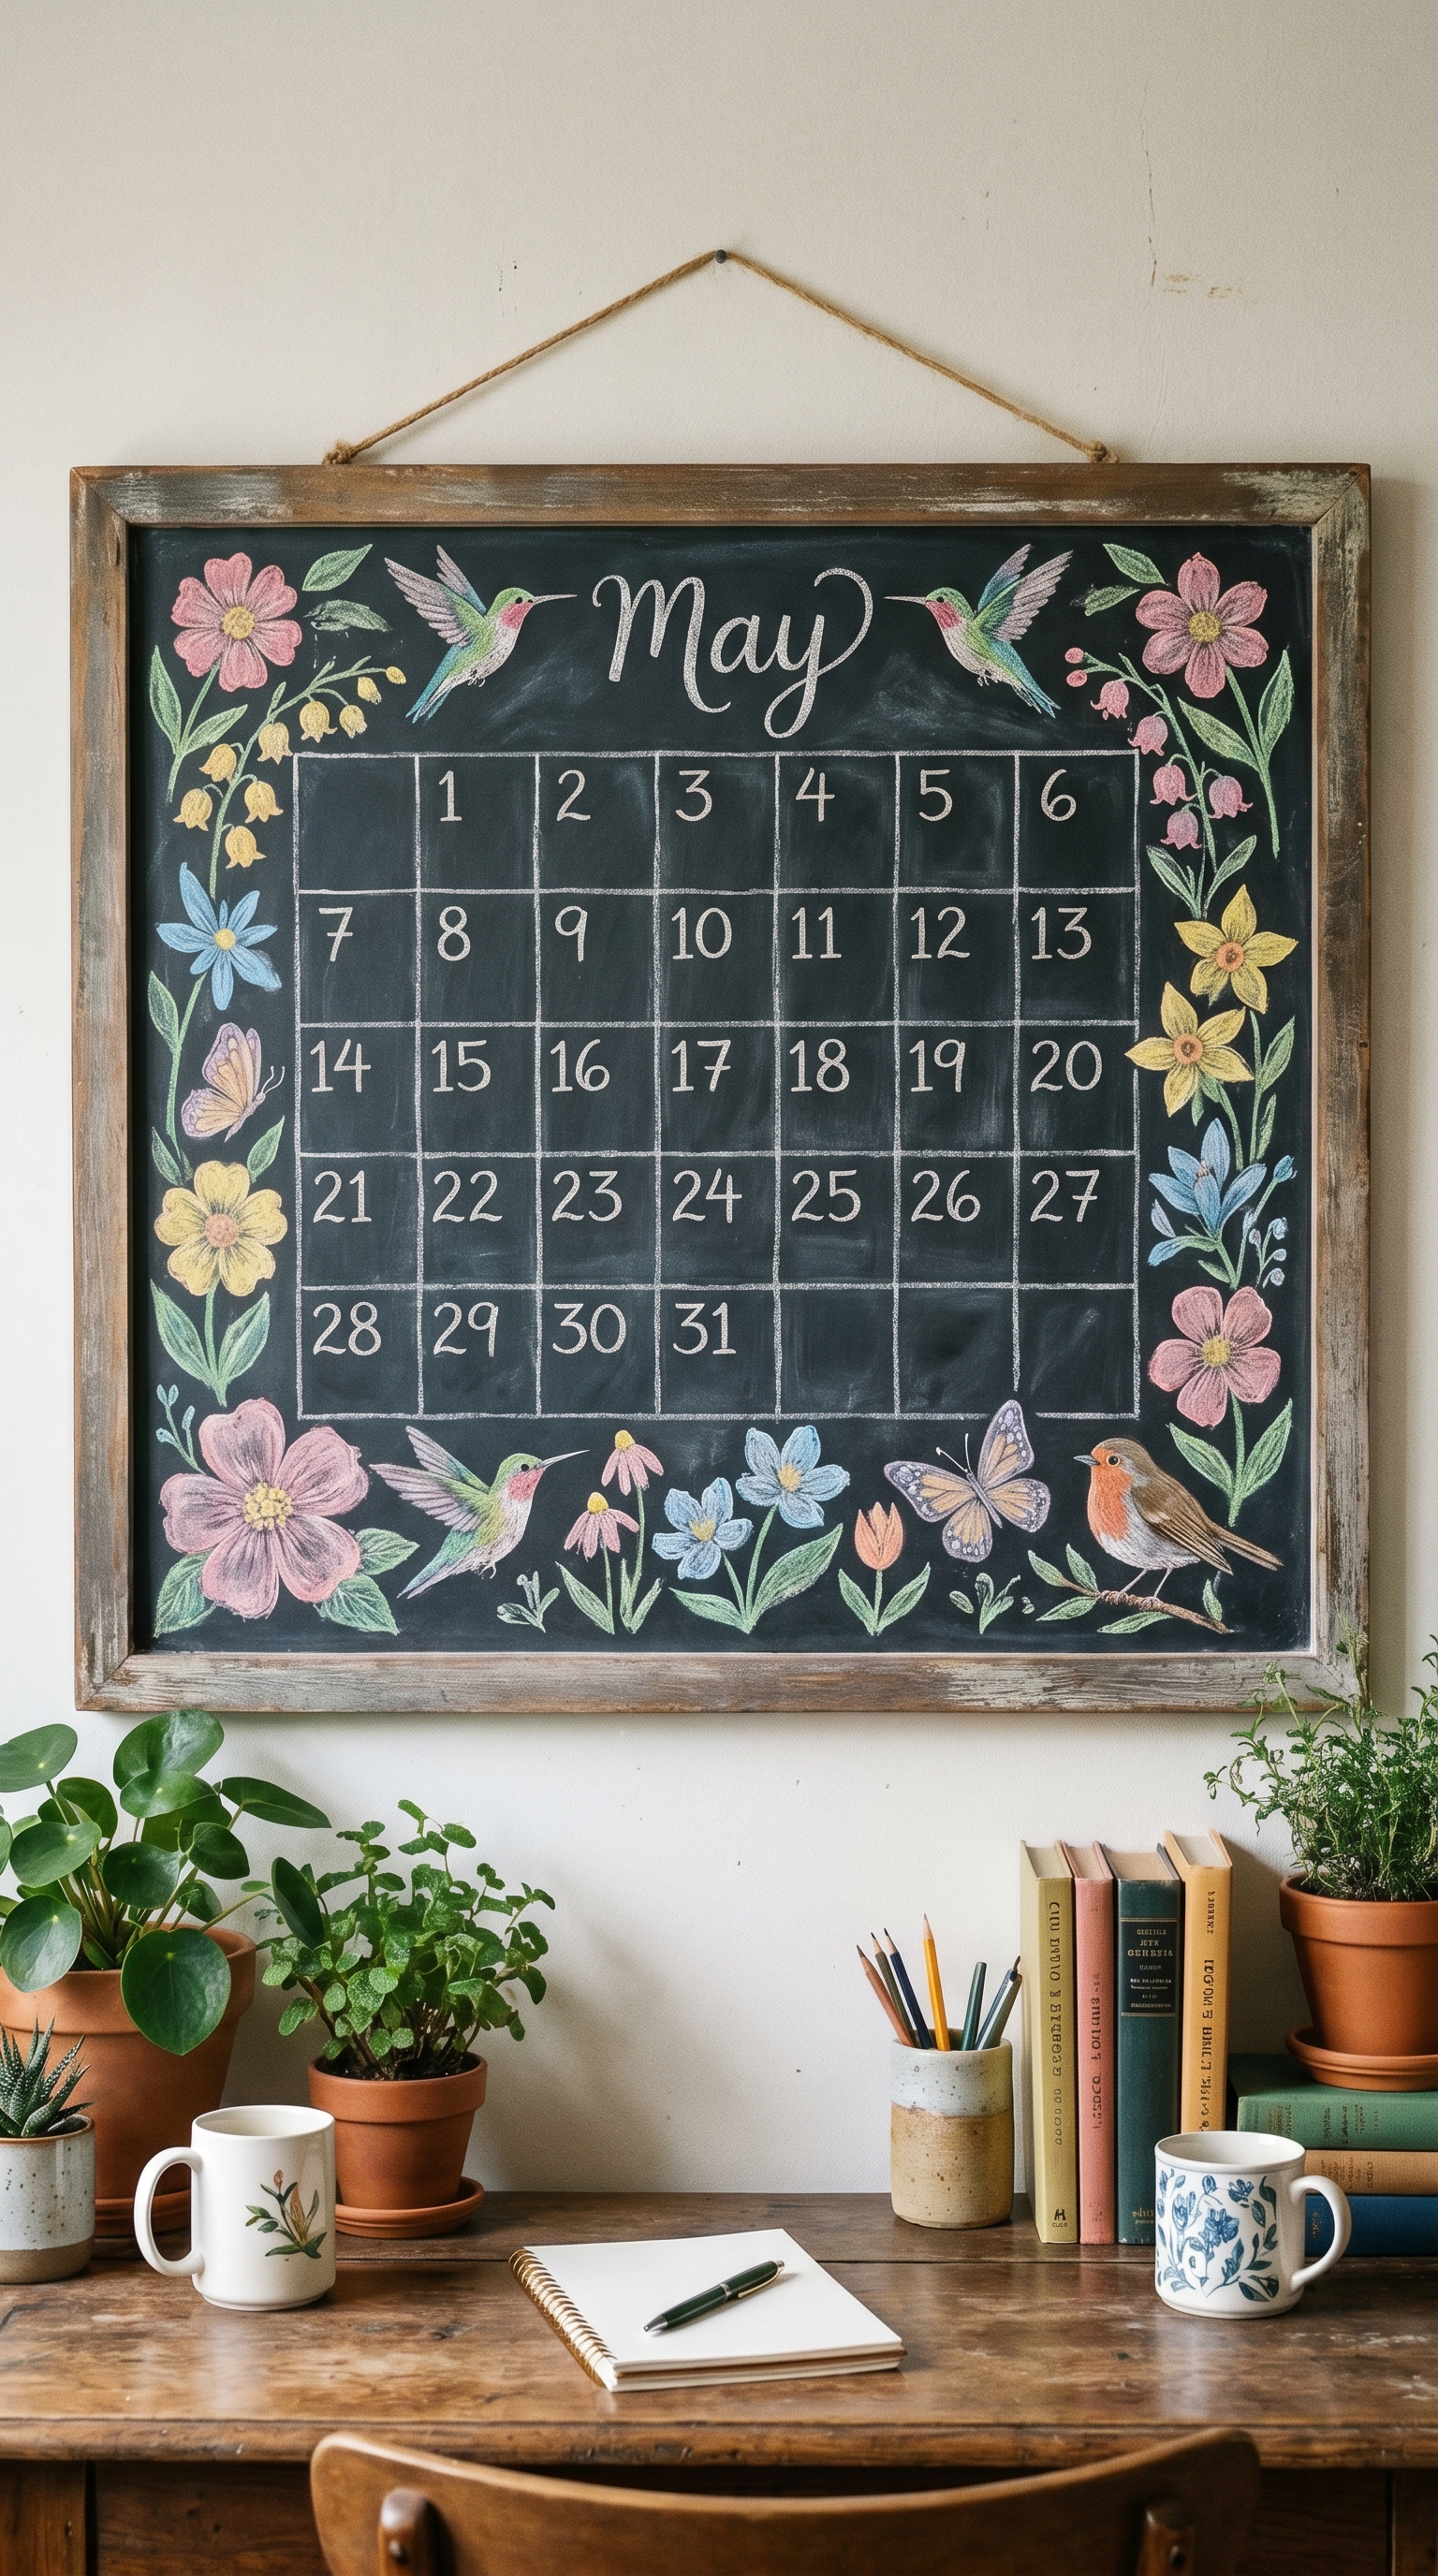
1. Classic 7×5 Grid with Clean Lines
The classic seven-column by five-row grid is the most straightforward chalkboard calendar you can make. Use a ruler and a fine-tip white chalk marker to draw clean, even lines, then fill in the dates in neat numbers. Keep the month name bold and centered at the top. This minimalist approach is surprisingly elegant — the symmetry and spacing do all the visual heavy lifting. It is the perfect foundation if you want to add small seasonal doodles later, or you can leave it clean for a crisp, modern look that fits any room.
2. Color-Coded Family Calendar
Assign each family member a different chalk marker color and watch your calendar become a visual organizer that everyone can read at a glance. Mom's appointments in pink, dad's meetings in blue, kids' activities in green, and shared events in white. Draw the grid in white, then fill in each date's events in the appropriate color. This system turns a simple calendar into a communication tool that keeps the whole household on the same page — and it looks cheerful and colorful on your wall too.
3. Minimalist Number-Only Grid
Strip your calendar down to the bare essentials: numbers only, no labels, no doodles, no colors. Draw a light grid and write each date in a clean, consistent font. The beauty of this style is in its simplicity — the uniform numbers create a pleasing pattern that functions as subtle graphic art. It works especially well in modern and Scandinavian-inspired spaces where less is more. You can always add a single accent, like a tiny heart on a special date, for a touch of personality without breaking the minimalist vibe.
Decorative Border Ideas
A decorative border transforms a plain calendar grid into a piece of seasonal art. These three border styles each bring a different aesthetic to your May chalkboard.
4. Wildflower Border Calendar
Frame your calendar with a loose, hand-drawn wildflower border that looks like a garden growing around the edges of your board. Mix daisies, black-eyed Susans, and tiny lavender sprigs in soft pastel chalk markers. Let some flowers overlap the grid lines slightly for an organic, unrestrained look. This style is incredibly forgiving — wildflowers are meant to look a little wild, so there is no pressure for perfection. The result is a calendar that feels like a breath of fresh spring air every time you check the date.
5. Washi Tape Border Calendar
Apply colorful washi tape around the frame of your chalkboard for an instant decorative border that requires zero drawing skills. Choose spring-patterned tapes — florals, polka dots, or gingham — and layer them for a mixed-media look that pops. The tape also creates a crisp visual boundary that makes your calendar grid look more polished. Best of all, washi tape is removable and repositionable, so you can switch up the border design every month without any commitment or damage to your board.
6. Botanical Leaf Border Design
For an elegant, nature-inspired look, draw a border of trailing leaves and fern fronds around your calendar. Use varying shades of green chalk to create depth, and add fine white veins to the larger leaves for a realistic botanical illustration feel. This style has a more sophisticated, grown-up aesthetic compared to cute florals, making it a great choice for home offices and dining rooms. The monotone green palette keeps the design cohesive and lets the calendar dates stand out clearly.
Farmhouse Calendar Styles
Farmhouse style and chalkboard calendars are a natural match. These three designs embrace rustic charm, distressed textures, and that warm lived-in feeling that makes a house feel like home.
7. Rustic Wood Frame Calendar
Pair your chalkboard with a chunky, weathered wood frame and lean into the rustic aesthetic. Draw your calendar grid with slightly imperfect, hand-drawn lines that feel casual rather than precise. Use bold, slightly uneven lettering for the month name and dates — the wobblier, the more authentic it looks. Add a small galvanized metal clip at the top to hold a seasonal notecard or photo. This style is all about embracing imperfection and creating something that feels warm, handmade, and full of character.
8. Shabby Chic Distressed Calendar
The shabby chic look starts with a distressed white-painted frame and a chalkboard surface that has been gently sanded in spots for a timeworn feel. Draw your calendar in a soft white chalk marker, and add delicate rose doodles in muted pink at the corners. The key to this style is softness — think faded colors, gentle curves, and a slightly dreamy aesthetic. It pairs perfectly with lace doilies, vintage pitchers, and other romantic cottage-core elements in your kitchen or bedroom.
9. Mason Jar Floral Calendar
Draw a large mason jar in the bottom center of your chalkboard, then fill it with an overflowing bouquet of simple spring flowers. Position your calendar grid above the jar so it looks like the arrangement is sitting on a shelf beneath the dates. This is one of the most charming and recognizable farmhouse chalkboard designs, and it is easier than it looks — the jar shape is simple to draw, and loose, sketchy flowers fill it beautifully. Add a twine bow at the neck of the jar for an extra touch of rustic charm.
How to Draw Your Calendar Step by Step
Drawing a chalkboard calendar is easier than you might think. Follow these five steps for a clean, professional-looking result every time. First, wipe your chalkboard with a damp cloth and let it dry completely — this removes old residue and gives you a fresh surface. Second, measure and mark the grid lines lightly with a chalk pencil, using a ruler to keep everything straight. Third, draw the grid with your chalk marker, starting with the horizontal lines and then the vertical columns. Fourth, write the month name at the top in your chosen lettering style, then fill in the dates. Fifth, add your decorative elements — borders, doodles, or seasonal accents — around the grid. Take it one step at a time and you will have a beautiful calendar finished in under an hour.
Love These Ideas?
Get more beautiful home decor inspiration delivered to your inbox every week. Join 10,000+ decor enthusiasts!
No spam, unsubscribe anytime.
What Supplies You Need
You do not need much to create a stunning chalkboard calendar. A framed chalkboard between 18x24 and 24x36 inches gives you enough space for a full monthly grid plus decorations. A set of fine-tip chalk markers in white and pastel colors covers most calendar designs. A ruler is essential for straight grid lines, and a chalk pencil lets you sketch your layout before committing with markers. Keep a damp cloth or chalkboard eraser handy for corrections, and a can of hairspray or chalk fixative to seal your finished art.
[AFFILIATE LINK: Chalkboard] [AFFILIATE LINK: Chalk Markers] [AFFILIATE LINK: Ruler Set]